> ## Documentation Index
> Fetch the complete documentation index at: https://cloud.laravel.com/docs/llms.txt
> Use this file to discover all available pages before exploring further.
# Environments
## Introduction
Laravel Cloud applications can be made up of many environments, such as "production", "staging", or even short-lived environments used for trialing new features you're developing for your application.
Compute infrastructure, resources, and deployment settings are unique to each environment, allowing you to fine-tune each environment based on its purpose.
For example, you might wish to assign small Flex compute instances that scale to zero to your staging environment, while larger, always-on compute instances are assigned to your production environment.
## Build and deploy commands
You may define how both the frontend and backend of your application are built during deployment from the "Deployments" section of your environment settings.
### Build commands
Build commands allow you to customize the build process for your application during deployment.
Typically, your Laravel build command will install Composer and NPM dependencies and compile your application's assets:
```shell theme={null}
composer install --no-dev && npm run build
```
Running `php artisan optimize` or `php artisan config:cache` should be done during the build process, not during the deploy process.
#### Private Composer packages
To allow the installation of private Composer packages, you will need to configure your application's Composer HTTP authentication credentials for each package using the `composer config` command. You should add this command to your build commands prior to invoking `composer install`:
```shell theme={null}
composer config http-basic.composer.fluxui.dev your-username your-license-key
composer install --no-dev
```
Typically, your Symfony build command will install Composer dependencies and compile your application's assets:
```shell theme={null}
composer install --no-dev && php bin/console asset-map:compile
```
#### Private Composer packages
To allow the installation of private Composer packages, you will need to configure your application's Composer HTTP authentication credentials for each package using the `composer config` command. You should add this command to your build commands prior to invoking `composer install`:
```shell theme={null}
composer config http-basic.example.com your-username your-license-key
composer install --no-dev
```
Build commands must complete within 15 minutes or they will time out.
#### Dynamic environment variables
```shell theme={null}
# Adding a dynamic environment variable
echo "MY_DYNAMIC_VAR=value" >> .env
```
### Deploy commands
Your environment's "Deploy Commands" are run on your Laravel Cloud infrastructure just before a new deployment goes "live". Typically, these commands will be used to migrate your environment's database.
Unlike build commands, changes made to the filesystem by deploy commands will not be persisted to your application.
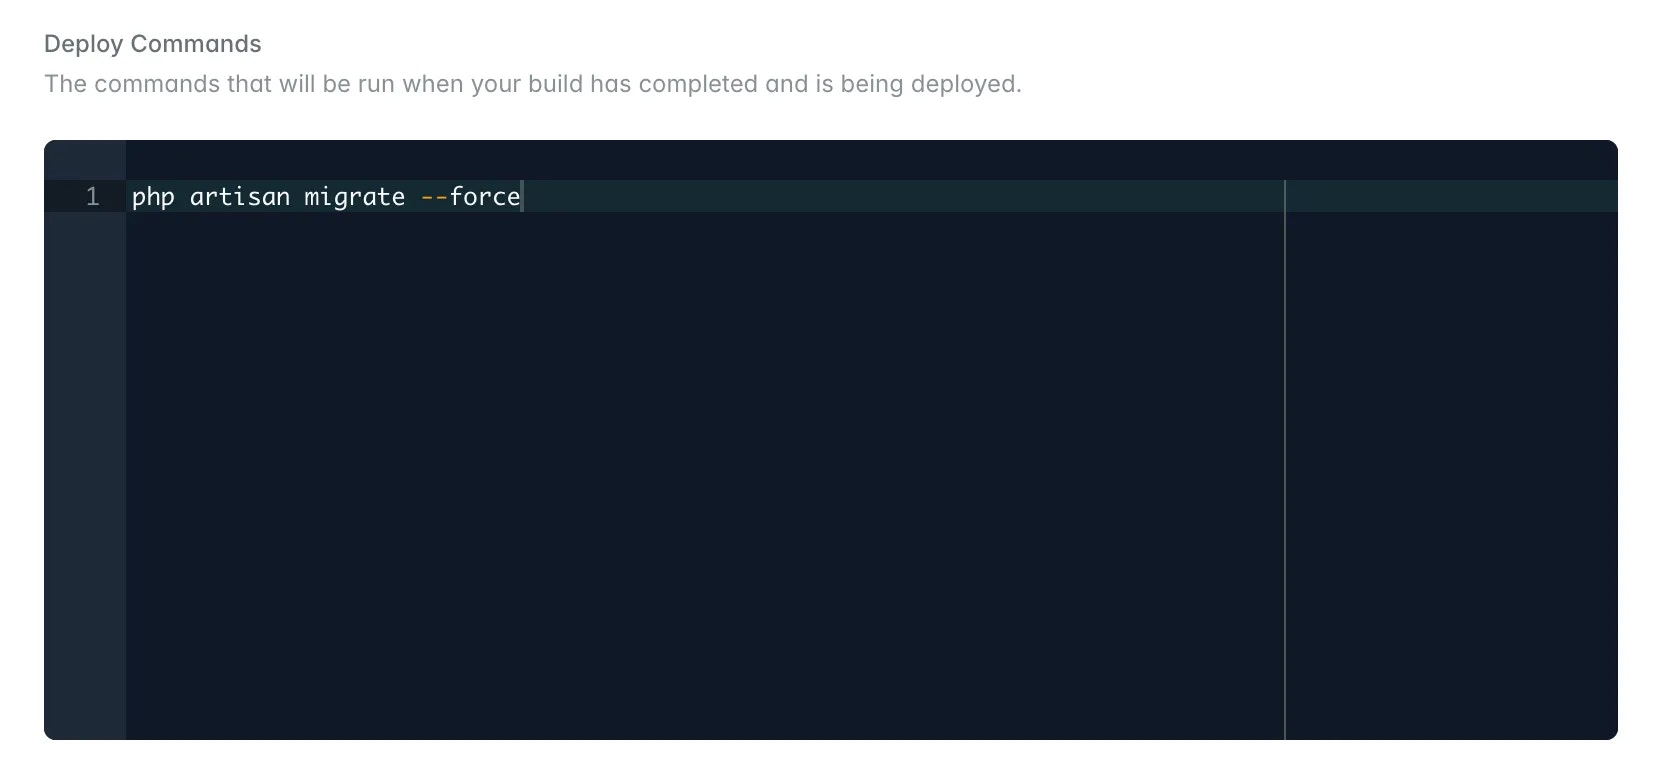 Deploy commands must complete within 15 minutes or they will time out.
#### Unnecessary build and deploy commands
This section applies to Laravel applications.
The following commands are either automatically handled by Laravel Cloud or should not be run during deployment:
* **`php artisan queue:restart`** - Queue workers are automatically restarted after each deployment
* **`php artisan horizon:terminate`** - Horizon processes are automatically managed during deployments
* **`php artisan optimize:clear`** - This clears the cache and can cause unexpected behavior, especially related to the queue
* **`php artisan storage:link`** - The symbolic link won't persist as changes made during deploy commands are not saved. Use [Laravel Object Storage](/resources/object-storage) for persistent file storage instead.
Typically, your deploy commands should only include database migrations and other essential post-deployment tasks.
## Environment settings
### Environment variables
Within your environment's settings, the environment variables section allows you to customize the `.env` variables available to your environment.
Deploy commands must complete within 15 minutes or they will time out.
#### Unnecessary build and deploy commands
This section applies to Laravel applications.
The following commands are either automatically handled by Laravel Cloud or should not be run during deployment:
* **`php artisan queue:restart`** - Queue workers are automatically restarted after each deployment
* **`php artisan horizon:terminate`** - Horizon processes are automatically managed during deployments
* **`php artisan optimize:clear`** - This clears the cache and can cause unexpected behavior, especially related to the queue
* **`php artisan storage:link`** - The symbolic link won't persist as changes made during deploy commands are not saved. Use [Laravel Object Storage](/resources/object-storage) for persistent file storage instead.
Typically, your deploy commands should only include database migrations and other essential post-deployment tasks.
## Environment settings
### Environment variables
Within your environment's settings, the environment variables section allows you to customize the `.env` variables available to your environment.
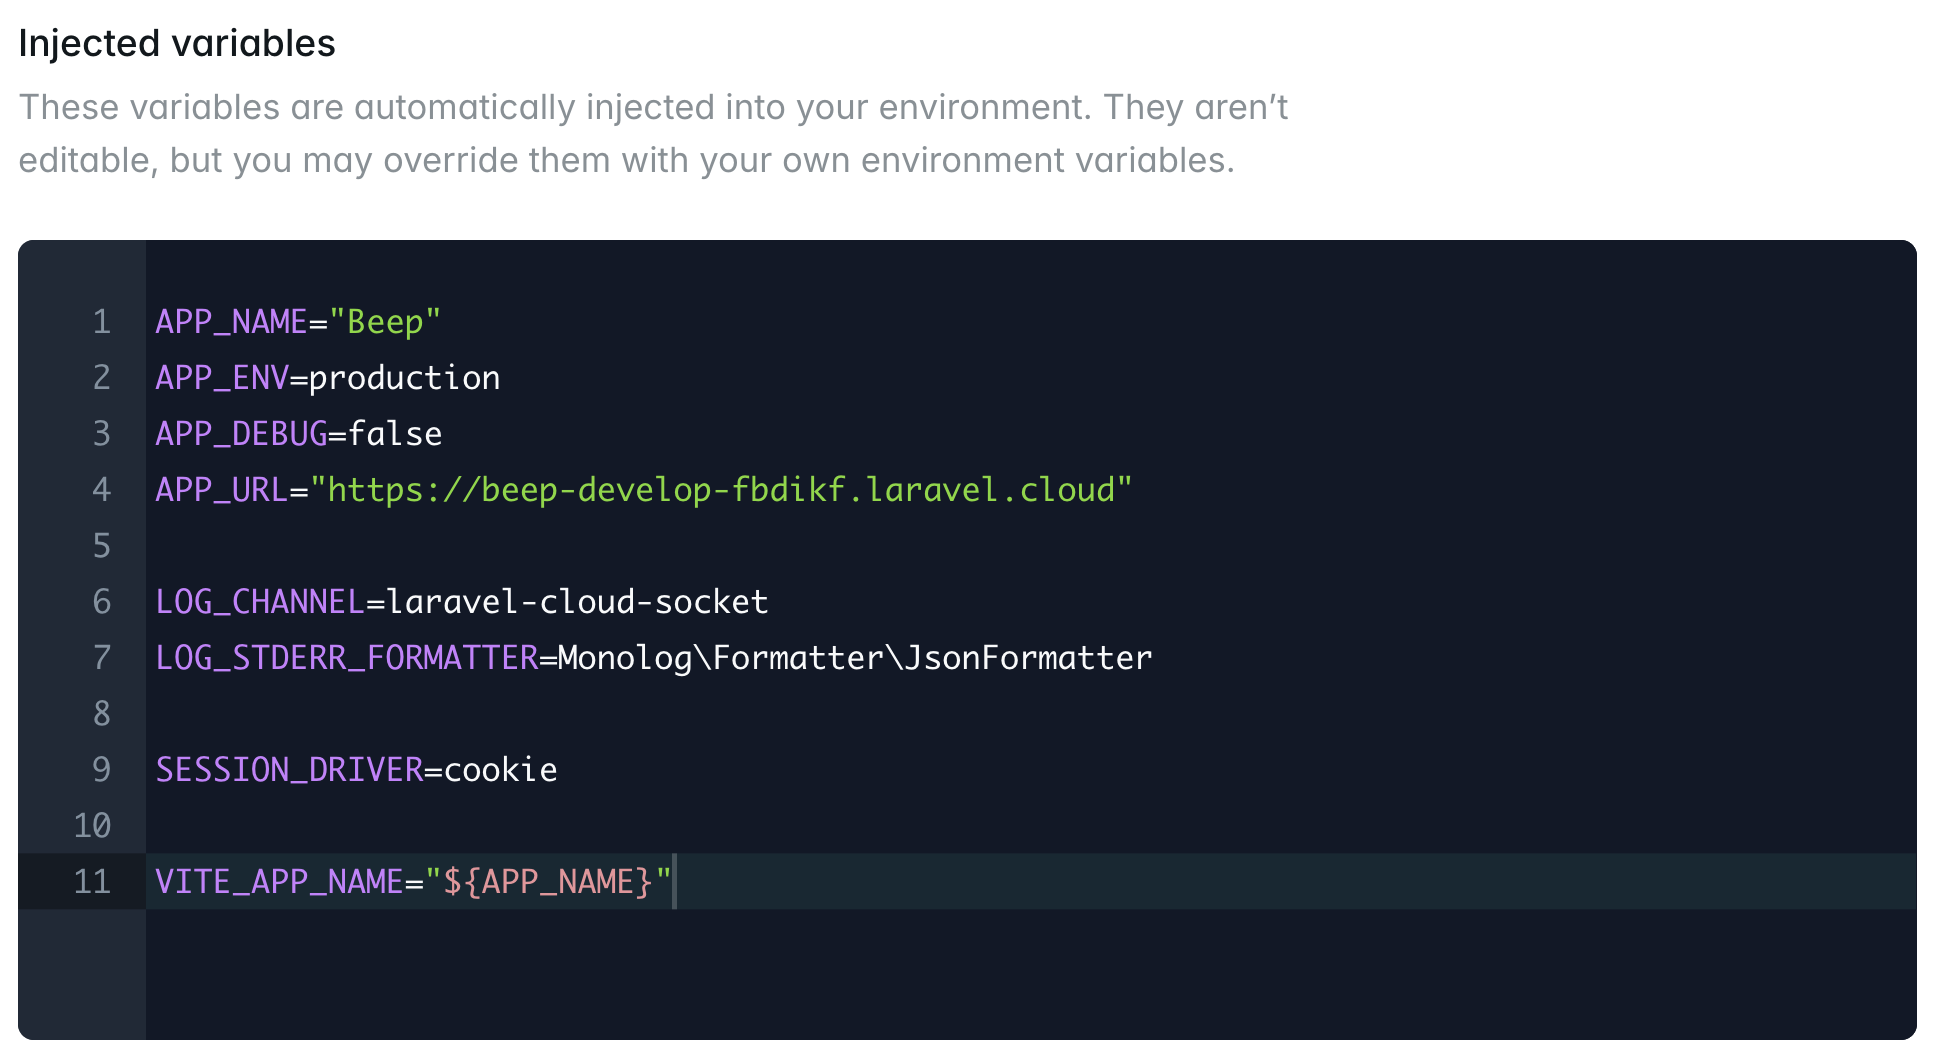
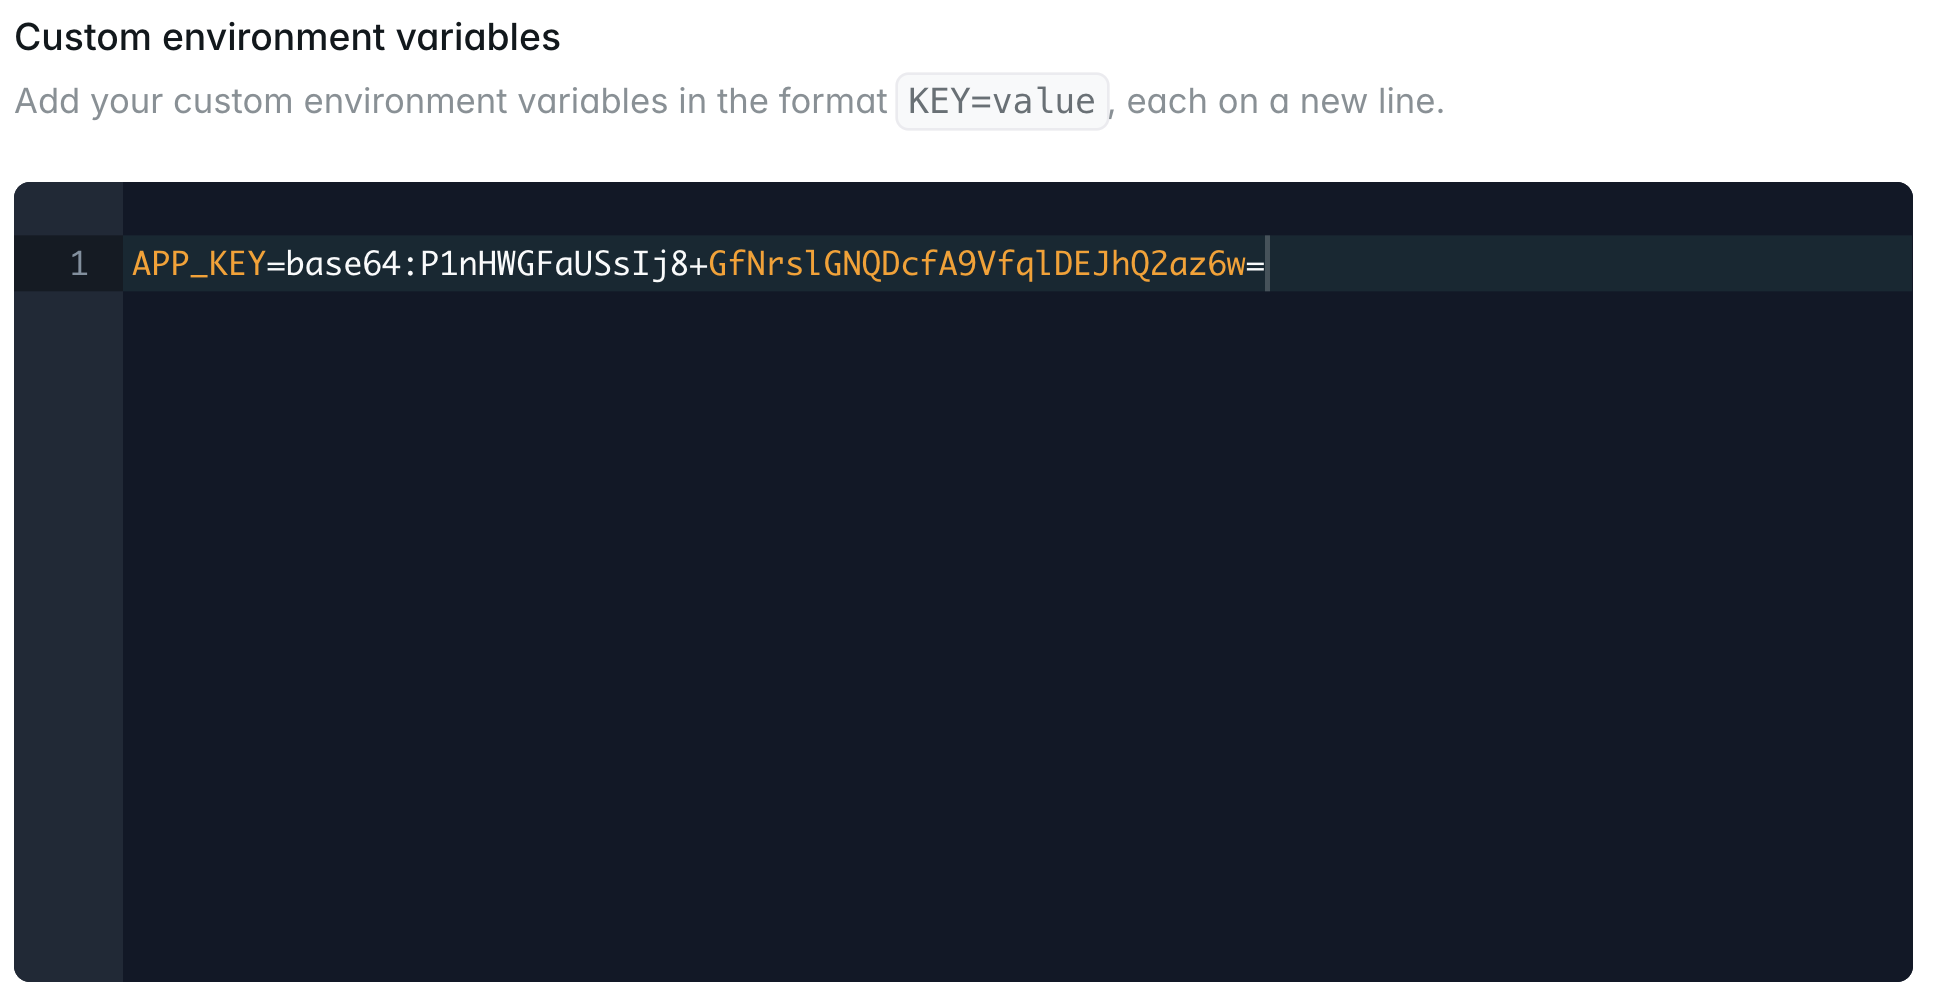 In addition to injecting your custom environment variables, Laravel Cloud will automatically inject a variety of environment variables into your environment on your behalf, including any credentials necessary to connect to Laravel Cloud resources like databases, key-value storage, or object storage.
 For sensitive values that should be shared across multiple environments, use [Secrets Manager](/secrets) to create encrypted organization-level secrets and link them to the environments that need them.
Custom environment variables take priority and will override any automatically injected environment variables.
After you change an environment's variables, redeploy the environment for the changes to take effect.
### HTTP basic authentication
HTTP basic authentication allows you to protect an environment with a username and password before traffic reaches your application. This is useful for staging environments, private demos, preview environments, or sleeping environments that should not wake up because of unauthorized requests or automated bot traffic.
You may enable HTTP basic authentication from your environment's General Settings page in the Security section. When enabled, users can access the environment using the username `admin` and the password you set. Passwords must be between 5 and 32 characters and cannot contain the `:` character.
For sensitive values that should be shared across multiple environments, use [Secrets Manager](/secrets) to create encrypted organization-level secrets and link them to the environments that need them.
Custom environment variables take priority and will override any automatically injected environment variables.
After you change an environment's variables, redeploy the environment for the changes to take effect.
### HTTP basic authentication
HTTP basic authentication allows you to protect an environment with a username and password before traffic reaches your application. This is useful for staging environments, private demos, preview environments, or sleeping environments that should not wake up because of unauthorized requests or automated bot traffic.
You may enable HTTP basic authentication from your environment's General Settings page in the Security section. When enabled, users can access the environment using the username `admin` and the password you set. Passwords must be between 5 and 32 characters and cannot contain the `:` character.
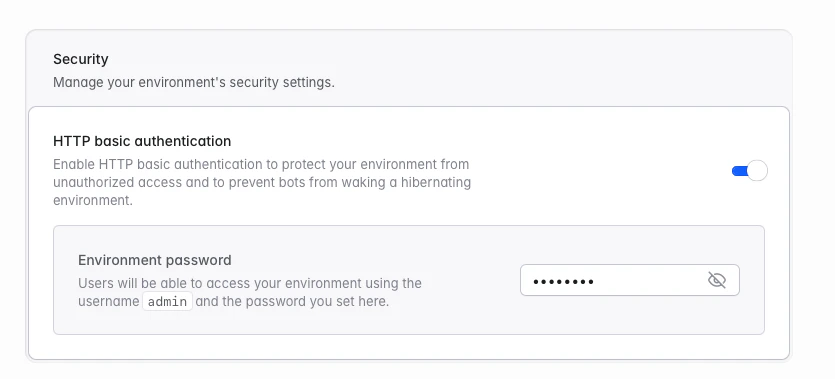 HTTP basic authentication is available on the [Growth plan](/pricing) or higher. After enabling, disabling, or changing the password, a re-deployment is required in order for the changes to take effect.
### Runtime
#### PHP runtime
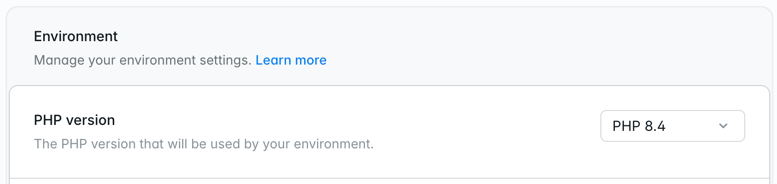
Laravel Cloud supports PHP 8.2, 8.3, 8.4, and 8.5 for Laravel and Symfony applications. PHP 8.5 is the default selection for new environments.
You may select the PHP version that should be used by an environment on the environment's General Settings page. After changing the PHP version, a re-deployment is required in order for the changes to take effect.
PHP 8.5 is generally available, but the pdo\_sqlsrv extension is temporarily unavailable until the upstream project adds 8.5 support. Use PHP 8.2, 8.3, or 8.4 if you need those extensions today.
HTTP basic authentication is available on the [Growth plan](/pricing) or higher. After enabling, disabling, or changing the password, a re-deployment is required in order for the changes to take effect.
### Runtime
#### PHP runtime
Laravel Cloud supports PHP 8.2, 8.3, 8.4, and 8.5 for Laravel and Symfony applications. PHP 8.5 is the default selection for new environments.
You may select the PHP version that should be used by an environment on the environment's General Settings page. After changing the PHP version, a re-deployment is required in order for the changes to take effect.
PHP 8.5 is generally available, but the pdo\_sqlsrv extension is temporarily unavailable until the upstream project adds 8.5 support. Use PHP 8.2, 8.3, or 8.4 if you need those extensions today.
 ### PHP extensions
PHP extensions are only available for PHP runtime environments (Laravel and Symfony).
Laravel Cloud currently supports the following PHP extensions:
```
apcu, bcmath, calendar, Core, ctype, curl, date, dom, ev, excimer, exif,
fileinfo, filter, ftp, gd, gettext, gmp, grpc, hash, iconv, igbinary, imagick,
imap, intl, json, ldap, libxml, mbstring, mongodb, msgpack, mysqli,
mysqlnd, openssl, pcntl, pcre, PDO, pdo_mysql, pdo_pgsql, pdo_sqlite, pdo_sqlsrv,
Phar, posix, pspell, random, readline, redis, Reflection, session, shmop,
SimpleXML, soap, sockets, sodium, SPL, sqlite3, sqlsrv, standard, tokenizer, xml,
xmlreader, xmlwriter, xsl, Zend OPcache, zip, zlib.
```
You can also list the currently loaded extensions by running `php -m` using Laravel Cloud's "Command" feature in your environment dashboard.
### PHP memory limit
This section applies to PHP runtime environments (Laravel and Symfony).
Laravel Cloud allocates PHP memory dynamically based on a percentage of your instance's total memory. If your application requires a specific amount, you can override this by defining a new `memory_limit`.
You can override the default memory limit by adding configuration directly in your application code. The most common method is to update your `public/index.php` and your `artisan` file:
```php theme={null}
### PHP extensions
PHP extensions are only available for PHP runtime environments (Laravel and Symfony).
Laravel Cloud currently supports the following PHP extensions:
```
apcu, bcmath, calendar, Core, ctype, curl, date, dom, ev, excimer, exif,
fileinfo, filter, ftp, gd, gettext, gmp, grpc, hash, iconv, igbinary, imagick,
imap, intl, json, ldap, libxml, mbstring, mongodb, msgpack, mysqli,
mysqlnd, openssl, pcntl, pcre, PDO, pdo_mysql, pdo_pgsql, pdo_sqlite, pdo_sqlsrv,
Phar, posix, pspell, random, readline, redis, Reflection, session, shmop,
SimpleXML, soap, sockets, sodium, SPL, sqlite3, sqlsrv, standard, tokenizer, xml,
xmlreader, xmlwriter, xsl, Zend OPcache, zip, zlib.
```
You can also list the currently loaded extensions by running `php -m` using Laravel Cloud's "Command" feature in your environment dashboard.
### PHP memory limit
This section applies to PHP runtime environments (Laravel and Symfony).
Laravel Cloud allocates PHP memory dynamically based on a percentage of your instance's total memory. If your application requires a specific amount, you can override this by defining a new `memory_limit`.
You can override the default memory limit by adding configuration directly in your application code. The most common method is to update your `public/index.php` and your `artisan` file:
```php theme={null}
 ## Custom domains
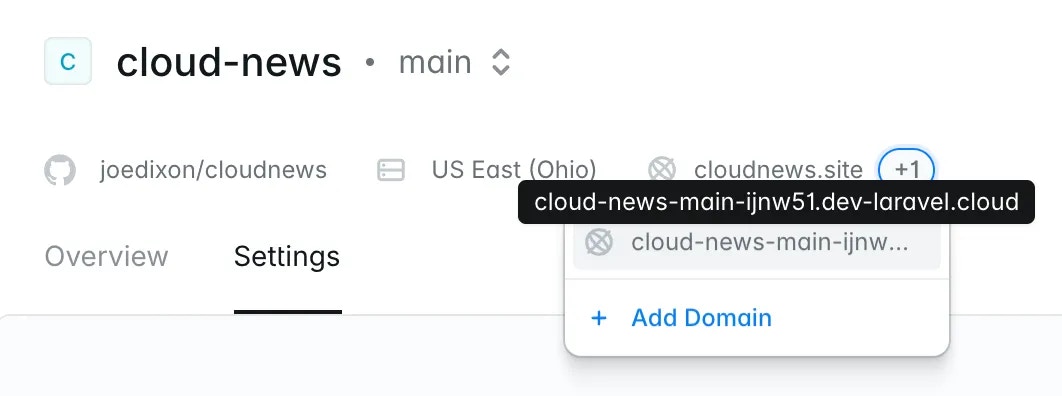
Of course, before shipping your application to the world, you will likely want to assign your own custom domain name to your production environment.
Laravel Cloud will guide you through DNS configuration, verify domain ownership, and issue an SSL certificate automatically.
For comprehensive documentation (DNS records, verification paths, wildcards, provider-specific guides, and plan limits), see [Domains](/domains).
If your domain verification is taking longer than expected, check out our docs on [verifying domains](/knowledge-base/domain-verification).
## Stop and restart
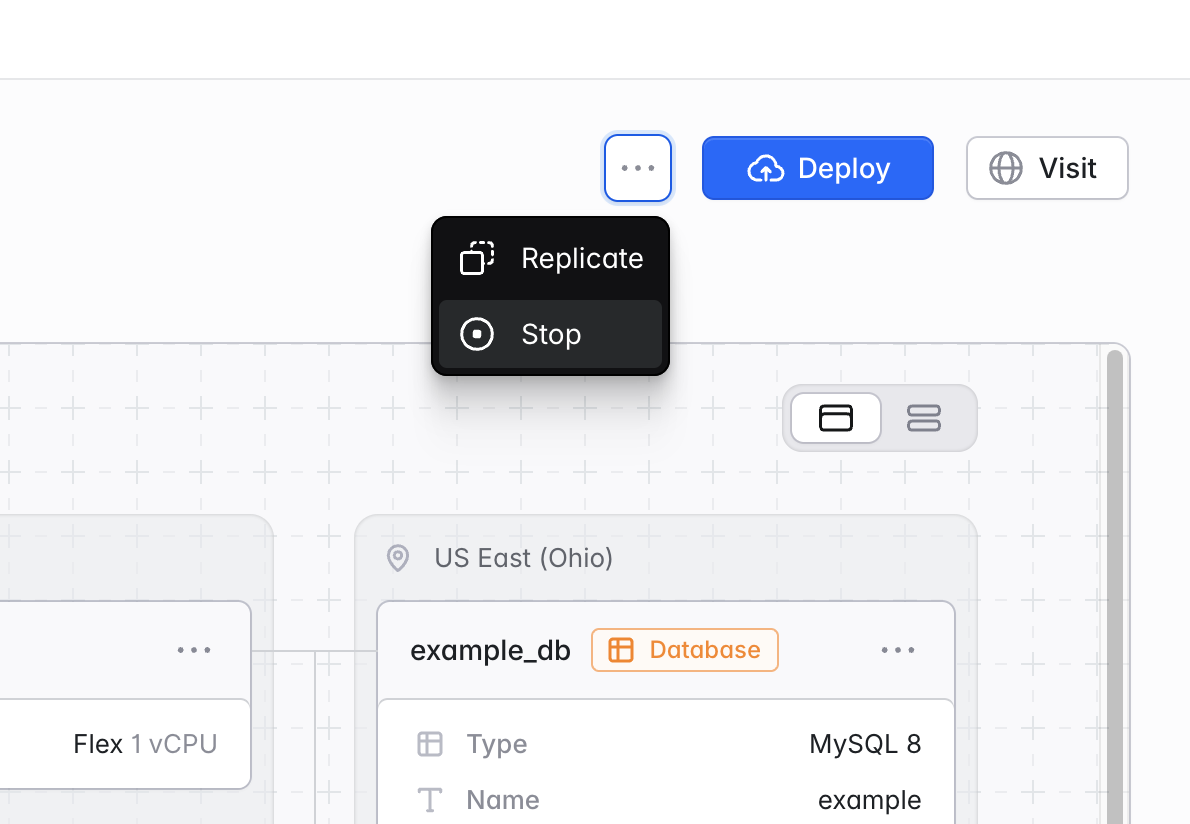
To stop an environment, click the "..." button next to the environment's "Deploy" button. Then, click "Stop". When you stop an environment, all App and Worker clusters within the environment will be shutdown. This means all web traffic, background processes, and scheduled tasks will stop processing. You will not be charged for the environment's compute, but you will still be charged for any attached resources.
You can restart the environment using the same dropdown menu. A full deployment is required to restart an environment.
## Custom domains
Of course, before shipping your application to the world, you will likely want to assign your own custom domain name to your production environment.
Laravel Cloud will guide you through DNS configuration, verify domain ownership, and issue an SSL certificate automatically.
For comprehensive documentation (DNS records, verification paths, wildcards, provider-specific guides, and plan limits), see [Domains](/domains).
If your domain verification is taking longer than expected, check out our docs on [verifying domains](/knowledge-base/domain-verification).
## Stop and restart
To stop an environment, click the "..." button next to the environment's "Deploy" button. Then, click "Stop". When you stop an environment, all App and Worker clusters within the environment will be shutdown. This means all web traffic, background processes, and scheduled tasks will stop processing. You will not be charged for the environment's compute, but you will still be charged for any attached resources.
You can restart the environment using the same dropdown menu. A full deployment is required to restart an environment.
 ## Replicate
It is common for environments in the same application to have similar or identical resource and settings configurations. Therefore, when creating new environments, it is often more convenient to clone an existing environment and make changes rather than creating a new environment from scratch.
To replicate an environment, click the "..." button next to the environment's "Deploy" button. Then, click "Replicate". Confirm you are replicating the correct environment and Git branch, then enter a name for your new environment. By default, all General, Environment, and Deployment settings will be duplicated. You can optionally edit the default replication settings for compute and resources. The default replication behavior is:
* Compute: duplicate all clusters (including size, autoscaling, scale to zero, scheduler, and background process settings)
* Database: use the same database compute / storage cluster, but create a new logical database schema
* Cache: use the same KV Store instance, but add a unique `CACHE_PREFIX` environment variable to your application
* Object storage: no replication
## Replicate
It is common for environments in the same application to have similar or identical resource and settings configurations. Therefore, when creating new environments, it is often more convenient to clone an existing environment and make changes rather than creating a new environment from scratch.
To replicate an environment, click the "..." button next to the environment's "Deploy" button. Then, click "Replicate". Confirm you are replicating the correct environment and Git branch, then enter a name for your new environment. By default, all General, Environment, and Deployment settings will be duplicated. You can optionally edit the default replication settings for compute and resources. The default replication behavior is:
* Compute: duplicate all clusters (including size, autoscaling, scale to zero, scheduler, and background process settings)
* Database: use the same database compute / storage cluster, but create a new logical database schema
* Cache: use the same KV Store instance, but add a unique `CACHE_PREFIX` environment variable to your application
* Object storage: no replication
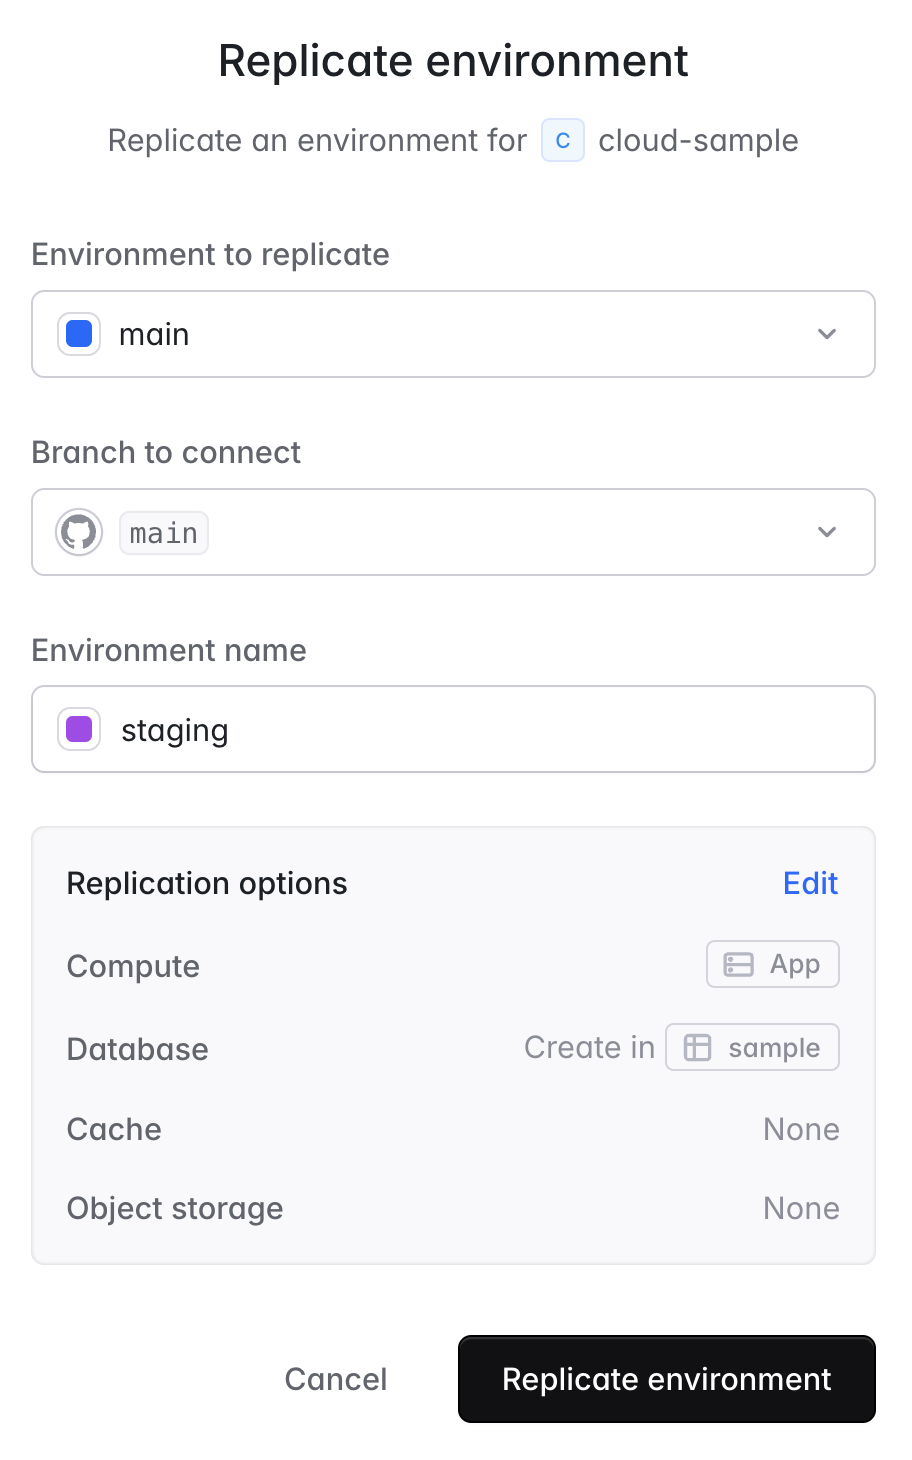 Review and edit the "Replication options" as needed before deploying your new environment. The defaults provided are a sensible balance between cost and performance, but may not be right for your application's specific use case. Use extra care when replicating a production environment to avoid reusing resources in a way that will impact performance or interfere with queued jobs, sessions, or other application data.
To generate an isolated environment automatically for every pull request, use [preview environments](/preview-environments) instead.
## Commands
Laravel Cloud allows you to execute arbitrary shell commands directly in your environment. Navigate to your environment's "Commands" tab to run one-time commands — for example, `php artisan cache:clear` in a Laravel application or `php bin/console cache:clear` in a Symfony application.
Commands should be non-interactive and may not run for more than 30 minutes.
Commands will be executed on any available instance in your environment.
## Filesystem
Environment filesystems are **ephemeral**, meaning files may not persist across requests or jobs. New deployments or re-deployments will reset the filesystem. In addition, each replica of your compute cluster has its own filesystem. Thus, you should treat the filesystem as temporary, unshared disk space that is only consistent during a single request or job.
The total disk space available on each replica is proportional to the compute / RAM of the cluster. Every 1GB of RAM is equal to 512MB of disk space. For example, a cluster with 2GB of RAM will have 1GB of ephemeral disk space available to it. If you exceed the available disk space, your application may crash and the deployment may need to restart.
For persistent cache and session storage, use the `redis` or `database` drivers via a [KV Store](./resources/caches) or [database](./resources/databases/laravel-mysql) resource. For persistent file storage, use [Laravel Cloud Object Storage](./resources/object-storage).
## Nightwatch integration
Nightwatch integration is currently available for Laravel applications only.
Laravel Cloud environments have built-in support for [Laravel Nightwatch](https://nightwatch.laravel.com) monitoring. Nightwatch provides deep insights into your application environment's performance, exceptions, logs, and overall health.
Review and edit the "Replication options" as needed before deploying your new environment. The defaults provided are a sensible balance between cost and performance, but may not be right for your application's specific use case. Use extra care when replicating a production environment to avoid reusing resources in a way that will impact performance or interfere with queued jobs, sessions, or other application data.
To generate an isolated environment automatically for every pull request, use [preview environments](/preview-environments) instead.
## Commands
Laravel Cloud allows you to execute arbitrary shell commands directly in your environment. Navigate to your environment's "Commands" tab to run one-time commands — for example, `php artisan cache:clear` in a Laravel application or `php bin/console cache:clear` in a Symfony application.
Commands should be non-interactive and may not run for more than 30 minutes.
Commands will be executed on any available instance in your environment.
## Filesystem
Environment filesystems are **ephemeral**, meaning files may not persist across requests or jobs. New deployments or re-deployments will reset the filesystem. In addition, each replica of your compute cluster has its own filesystem. Thus, you should treat the filesystem as temporary, unshared disk space that is only consistent during a single request or job.
The total disk space available on each replica is proportional to the compute / RAM of the cluster. Every 1GB of RAM is equal to 512MB of disk space. For example, a cluster with 2GB of RAM will have 1GB of ephemeral disk space available to it. If you exceed the available disk space, your application may crash and the deployment may need to restart.
For persistent cache and session storage, use the `redis` or `database` drivers via a [KV Store](./resources/caches) or [database](./resources/databases/laravel-mysql) resource. For persistent file storage, use [Laravel Cloud Object Storage](./resources/object-storage).
## Nightwatch integration
Nightwatch integration is currently available for Laravel applications only.
Laravel Cloud environments have built-in support for [Laravel Nightwatch](https://nightwatch.laravel.com) monitoring. Nightwatch provides deep insights into your application environment's performance, exceptions, logs, and overall health.
 Install the Laravel Nightwatch package in your application locally using [Composer](https://packagist.org/packages/laravel/nightwatch):
```bash theme={null}
composer require laravel/nightwatch
```
Run
Install the Laravel Nightwatch package in your application locally using [Composer](https://packagist.org/packages/laravel/nightwatch):
```bash theme={null}
composer require laravel/nightwatch
```
Run composer require laravel/nightwatch on your local machine to update your composer.json and composer.lock files before deploying.
Click the Connect Nightwatch button in your environment dashboard.
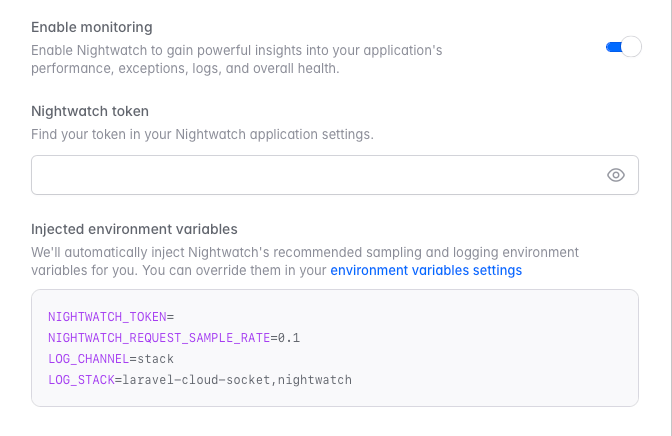
Toggle Enable monitoring to activate Nightwatch for your environment.
Enter your Nightwatch token, which you can find in your Nightwatch application settings.
Enabling Nightwatch will automatically run the agent across all the App compute and Worker clusters in the environment. You can [setup Nightwatch manually](/knowledge-base/nightwatch-on-cloud) if you want the agent to run on specific instances.
When enabled, Laravel Cloud will automatically inject the following environment variables into your environment:
```
NIGHTWATCH_TOKEN=
NIGHTWATCH_REQUEST_SAMPLE_RATE=0.1
LOG_CHANNEL=stack
LOG_STACK=laravel-cloud-socket,nightwatch
```
You can override these variables in your environment variable settings if needed.
If you have previously [configured Nightwatch manually](/knowledge-base/nightwatch-on-cloud) with a background process, you must remove that process from every cluster before enabling the built-in integration to avoid issues with your environment.