Introduction
Laravel Valkey is a fully managed, Redis-compatible KV store and cache for your application. Laravel Valkey comes in various sizes (starting at 250MB), is more performant and less expensive than industry averages, and can scale automatically. Flex sizes can also scale to zero when idle. All Laravel Valkey instances support up to 10,000 concurrent connections.
KV stores serve multiple purposes within your Laravel application. They can function as your application’s cache, a backend for storing queued jobs, or for managing sessions. Additionally, you have the option to interact directly with the key-value store by utilizing the Redis API.
Creating a Laravel Valkey cache
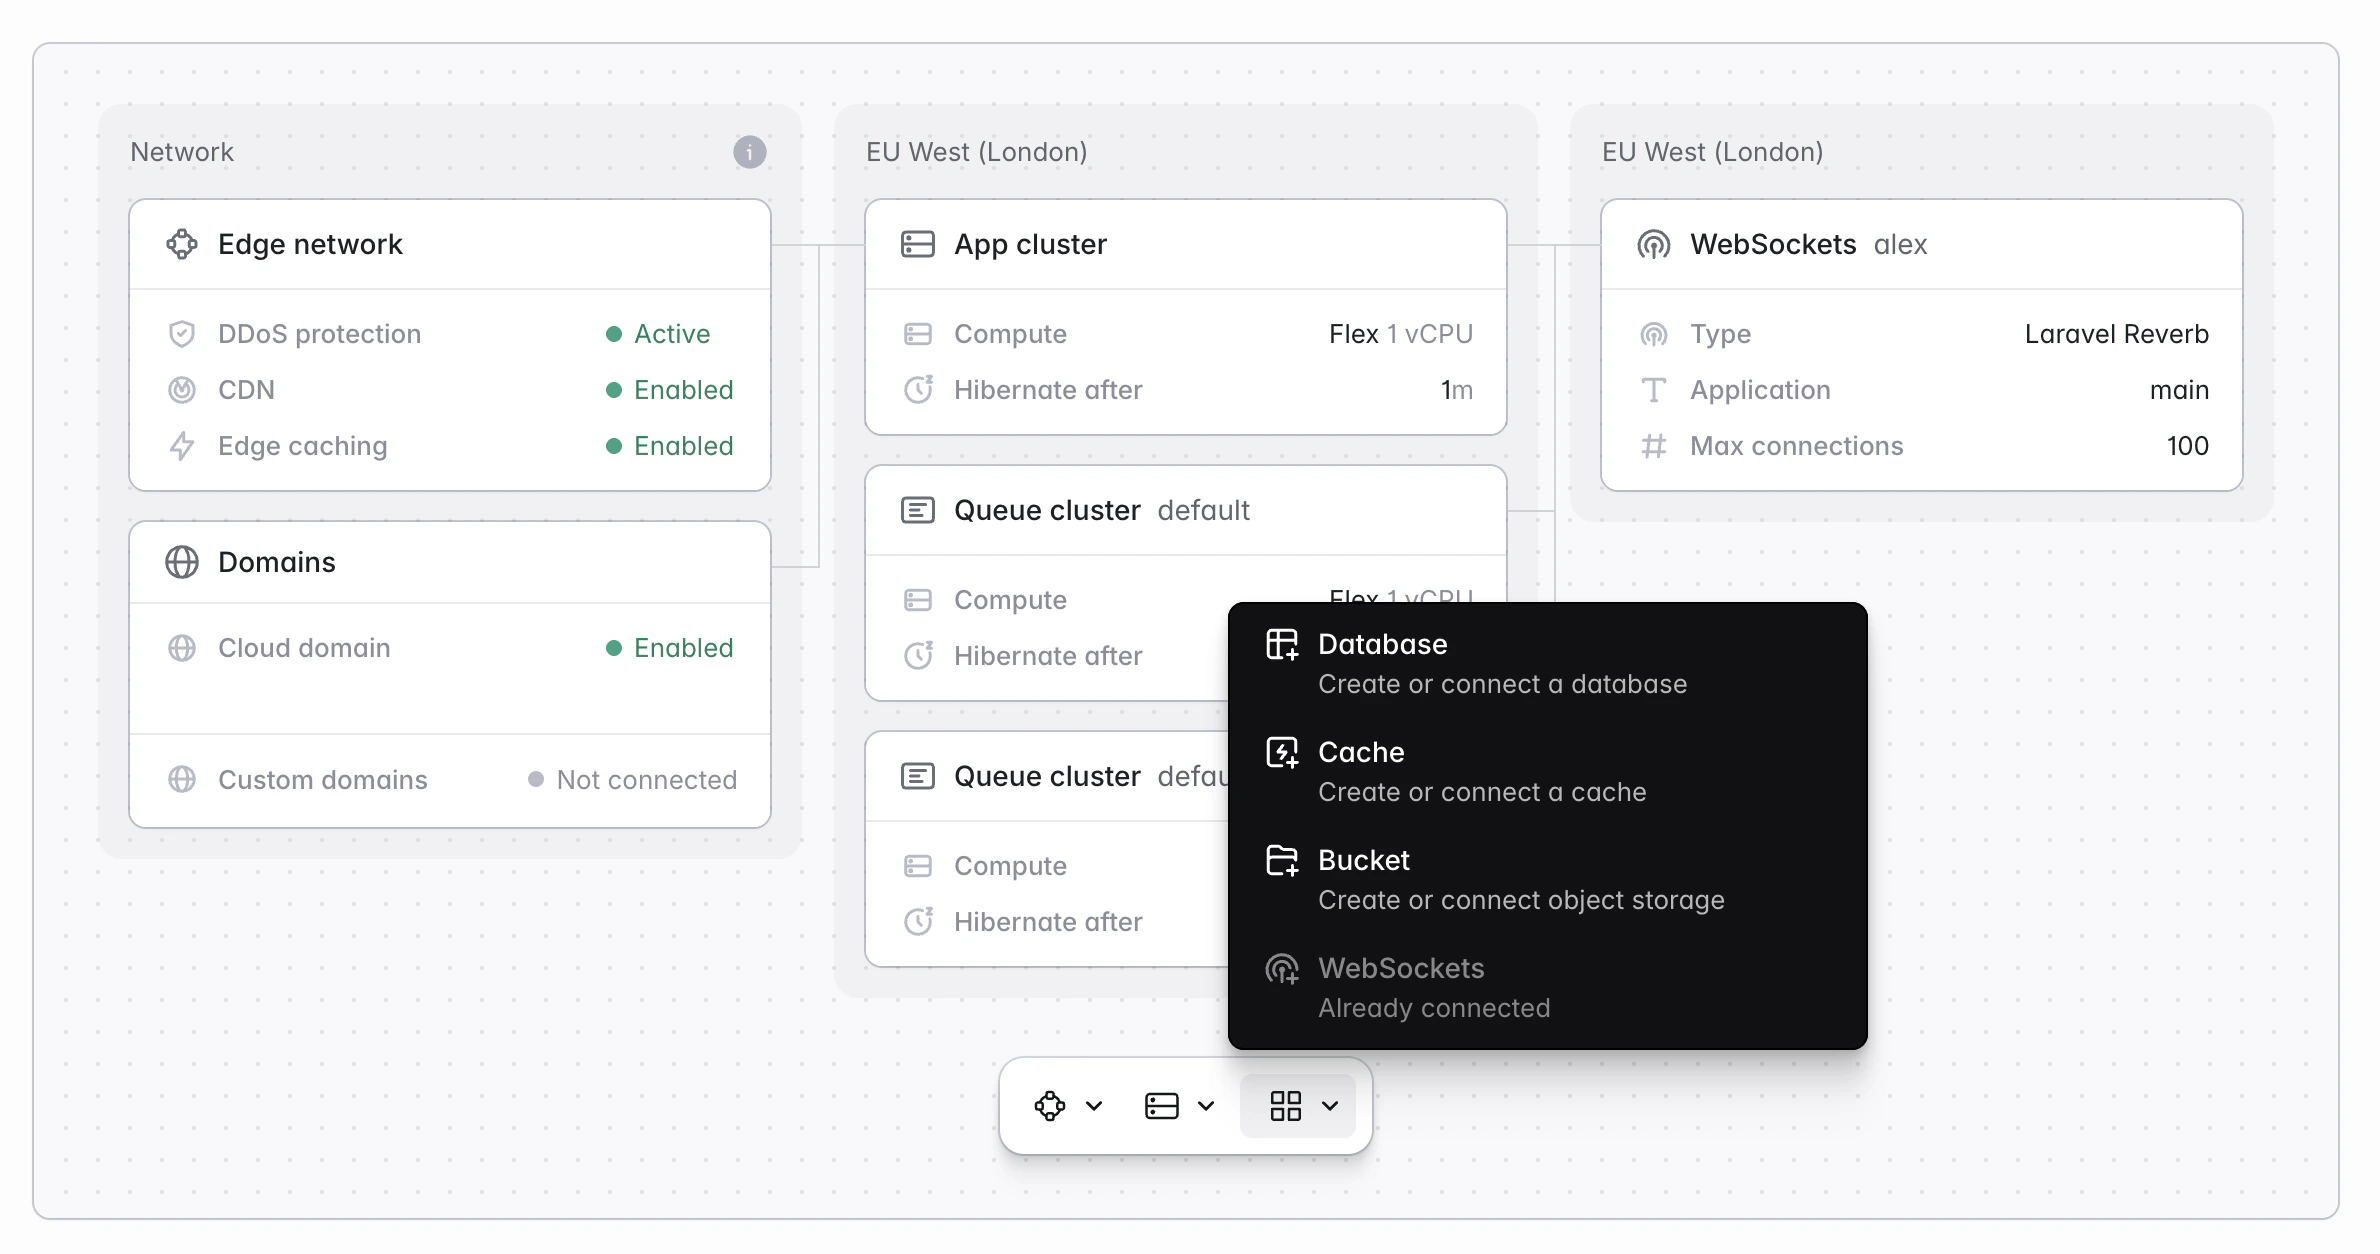
To attach a Laravel Valkey cache to an environment, click “Cache” on your environment’s canvas. Laravel Cloud will prompt you to select the cache you would like to attach to the environment or to create a new cache. When creating a new cache, select “Laravel Valkey” as your cache type.
Once the cache has been attached to an environment, you will need to redeploy the environment in order for the changes to take effect.
Visit the pricing docs for information on cache sizes and limits on message sizes.
Connecting to Laravel Valkey
From your application
When a cache is attached to an environment, Laravel Cloud will automatically inject the environment variables needed by the Laravel application to interact with the cache via the Cache facade, including the CACHE_STORE, REDIS_HOST, and REDIS_PASSWORD variables. You may view these environment variables in your environment’s General Settings.
From your local machine
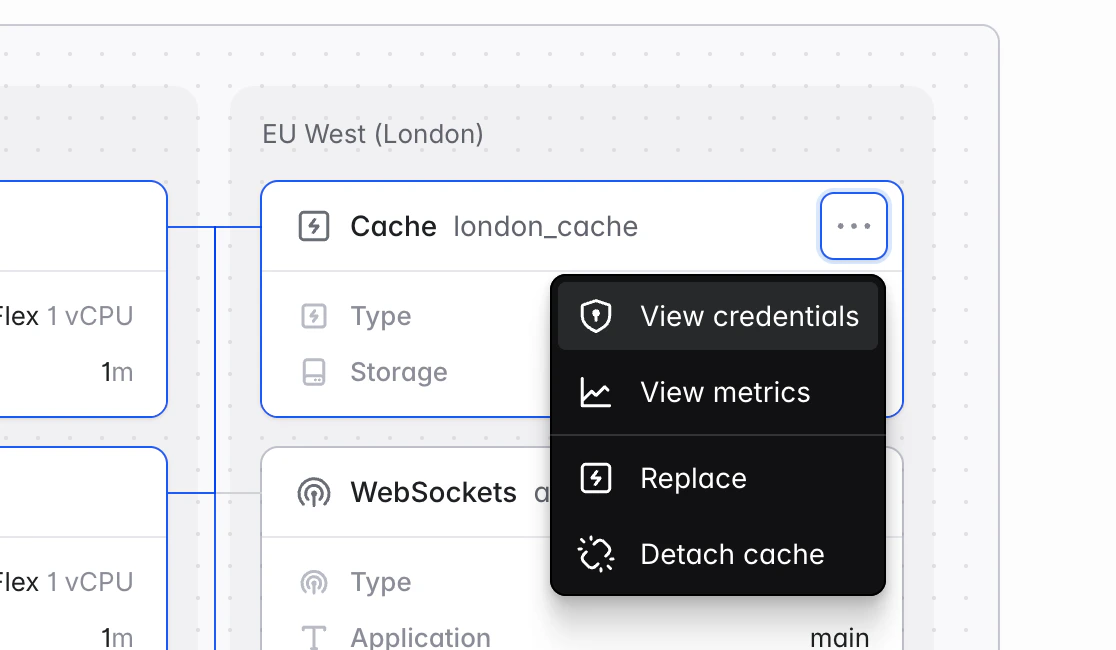
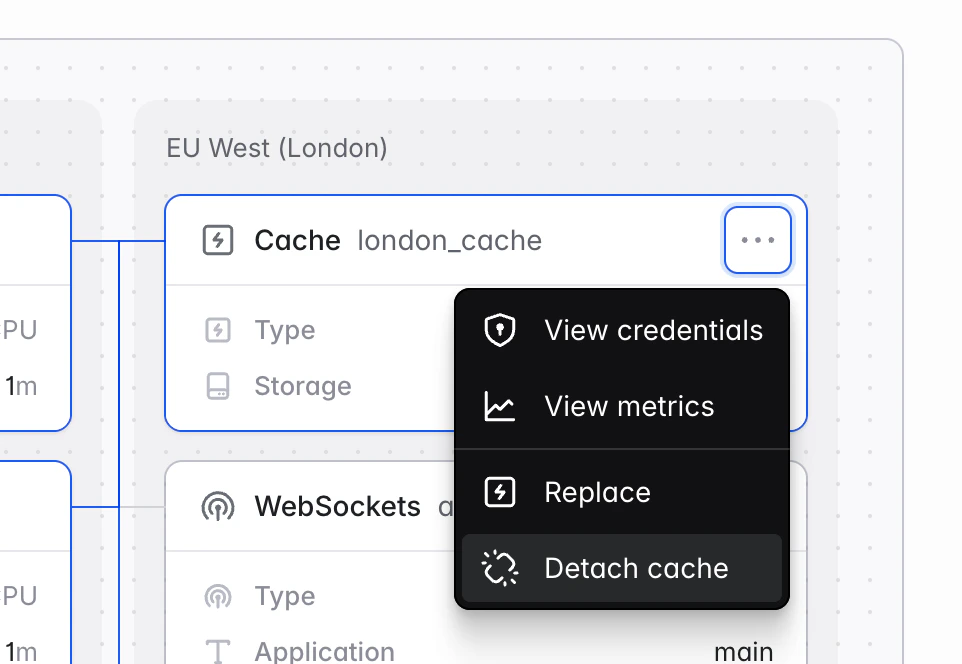
To connect to Laravel Valkey from your local machine, click the ”…” icon next to the cache card in your environment’s canvas dashboard, then click “View credentials”.
The cache credentials modal window will provide you with the credentials needed to connect to your cache, as well as a command-line instruction to connect to your Valkey cache server.
You may connect using a client that supports TLS and SNI, but note that some cache management tools are incompatible with this connection process.
Editing and resizing your cache
You may edit and resize a Laravel Valkey cache via your organization’s “Resources” page. From the “Resources” page, navigate to the “Caches” tab and click the ”…” icon for the cache you would like to edit or resize. Then, click “Edit settings”.
Detaching and deleting your cache
If a KV store is no longer needed in your project, you can detach it from your application canvas.
Detaching a KV store does not delete the store. As KV stores can be shared across many applications, you cannot directly delete a KV store from your application, only detach it.KV stores are billed for their availability, regardless of whether they are in use by an application. To permanently delete a KV store, you should visit your organization’s “Resources” page. Picking an eviction policy
When your cache reaches its memory limit, an eviction policy determines which data is removed to make room for new entries. With Laravel Valkey, you can configure this policy based on your application’s specific traffic patterns.
By default, we recommend using the allkeys-lru policy for most general-purpose use cases. It keeps your most recently accessed data in memory and evicts the items that haven’t been touched in a while, ensuring a high hit rate for active users.
If your workload has specific requirements (such as prioritizing keys with expiration timers), you can choose from the following Valkey-native policies:
allkeys-lfu - Evicts the least frequently used keys. Best for workloads where specific “hot” keys stay relevant for long periods.allkeys-random - Randomly removes keys to make space. Useful for testing or when all data has equal value.volatile-lru - Evicts the least recently used keys only among those with a TTL set. Best when you want to protect “permanent” keys from eviction.volatile-lfu - Evicts the least frequently used keys only among those with a TTL set. Best for frequency-based scaling with specific transient data.volatile-random - Randomly removes keys that have a TTL set. Rare use case; minimizes overhead but is unpredictable.volatile-ttl - Removes keys with a TTL set, starting with the shortest remaining life. Best when you want the “soonest to expire” to go first.noeviction - Returns an error when the memory limit is reached.
Scale to Zero
Laravel Valkey Flex sizes can scale to zero, sleeping when your cache is idle so that you are not billed for compute while it sleeps. When a Flex cache sleeps, its contents are snapshotted to disk and restored transparently when it wakes, so your data is preserved.
Scale to Zero is available as an opt-in setting. Larger Pro sizes are always-on and do not scale to zero. Pairing a Flex cache that scales to zero with application compute that scales to zero helps minimize costs on development environments and side projects.
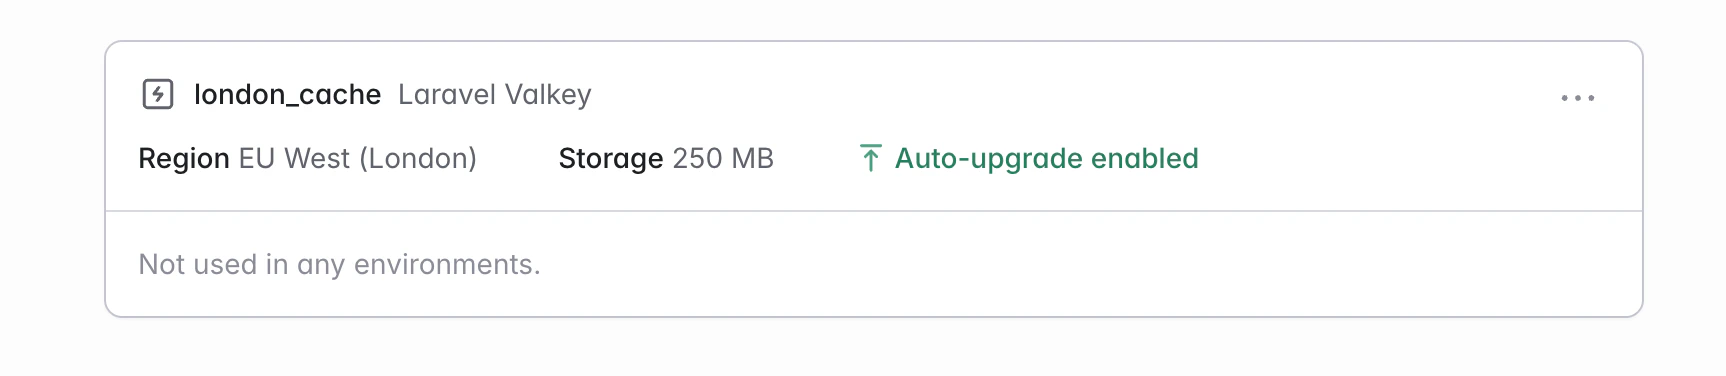
Auto-upgrade
Laravel Valkey has hard limits on usage, such as commands per second and message size. When these limits are reached, your cache may experience performance degradation or stop accepting new requests.
Laravel Cloud offers an automatic upgrade feature for Laravel Valkey, ensuring your cache continues to operate smoothly as your usage grows. You can enable or disable this feature at any time.
How auto-upgrades work
- Provisioning & Configuration: When you create or update a cache with auto-upgrade enabled, Laravel Cloud provisions the cache and configures its auto-upgrade settings.
- Monitoring: Laravel Cloud continuously monitors your cache’s usage. If your cache approaches its usage limits, the system prepares to upgrade.
- Notifications: When a threshold is reached or an upgrade is triggered, Laravel Cloud will send you an alert notification.
- Seamless Upgrade: The upgrade is performed automatically in the background, with no downtime for your application. Your cache is moved to the next available size.
With auto-upgrade enabled, your cache will scale automatically up to your current plan’s maximum capacity. To increase your cache size beyond these limits, you must upgrade your plan.
Monitoring cache metrics
You may view metrics such as storage usage, throughput, and hit / miss ratio for Laravel Valkey via your organization’s “Resources” page. From the “Resources” page, navigate to the “Caches” tab and click the ”…” icon for an available cache. Then, click “View metrics”.
Troubleshooting
Handling transient connection errors
As part of normal business operation (feature updates, security updates, etc.), your cache may restart. This may cause transient errors with some PHP clients, such as Error while reading line from the server or read error on connection to tls.
These are expected because a TCP connection cannot survive a server restart.
To mitigate this, we recommend that your application:
- Catches transient errors.
- Automatically reconnects to the cache through a new, healthy connection.
We recommend you follow the best practices listed here.
Connection force-closed
For the safety of your cache, we enforce a maximum limit on the size of the messages to your cache (see this table for a breakdown per cache storage). If a client sends a message that exceeds this limit, we will treat it as a protocol violation and immediately force-close the TCP connection.
Because the server drops the connection, your client won’t receive a standard error response. Instead, it will register a low-level network error, such as:
Error while reading line from the server (PHP)Error: read ECONNRESET (Node.js)Connection reset by peer (Python/Java)
To resolve this, you must reduce the message size or upgrade your cache size.